How to Build an Online Course Platform in Notion ( + free template)
Share

Creating an online course platform within Notion is an efficient and organized way to impart knowledge through the web. It is easy to share any Notion page to the web just like a website.
Here’s a step-by-step guide to help you get started!
Set Up the Introduction to Your Course
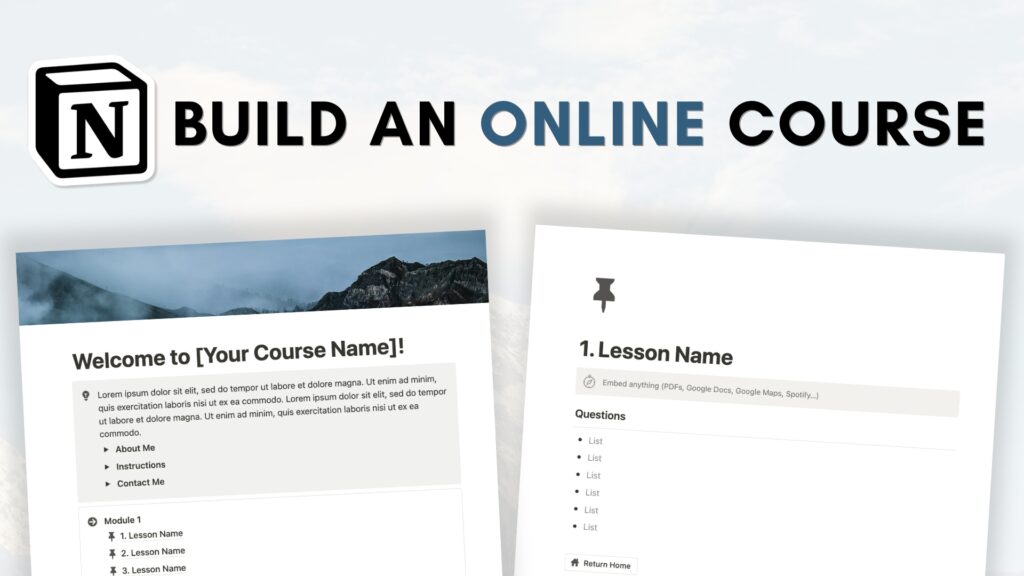
- Setup a Notion Page: Open a new Notion page and title it with your course name.
- Add a Cover Photo: Personalize the page by selecting a suitable cover photo from Unsplash.
- Constructing the Course Introduction: Underneath your course title, include an introduction section. This is an area where you can present details about yourself as the teacher, information about the course, instructions, and a means to contact you.
Structuring the Course Content
- Module Division: Use callout blocks to create modules. Designate these modules as fundamental topics, such as “Notion Basics,” allowing you to organize lessons within these modules.
- Creating Lessons: Inside each module, add lesson pages using the “/page” command. Each lesson page can contain various components, such as videos, textual content, embedded web articles, or questions for students to answer.
- Setting up Return Buttons: In each lesson, include a button to navigate back to the main course page to facilitate easy navigation for students. (check out the video at the bottom if you need more help with this)
Replicating Modules
- Duplicate Modules: After setting up the initial module structure, duplicate the modules and customize each new module for different sections of your course. All you need to do is click the six dots on the side of the block and “duplicate”
- Expansion and Customization: Add more lesson pages within each module as required.
Publishing the Course
- Sharing the Course: Notion allows you to publish your course online. Click on the “Share” button in the top-right corner and select “Publish.” This generates a web link to your course.
- Customize Publishing Settings: Tailor the publishing settings as needed, allowing or restricting editing, comments, and duplication based on your preferences.
Share and Learn
- Share the Course Link: Use the generated web link to share your course with students or participants.
- Further Notion Features: Consider upgrading to Notion Plus for additional functionalities like link expiration and search engine indexing if necessary.
With these steps, you’ve created an online course platform within Notion. This structure allows for easy navigation, presentation of course content, and a user-friendly experience for participants. Share your knowledge and expertise effectively using this organized setup.
Let’s start building your Online Course Platform in Notion!
We hope this build-with-me tutorial will help you get started with Notion and create a functional online course platform Notion template. We recommend you to open your Notion workspace and follow our video at the same time so you can learn faster by building. You can also download the finished template for free below!
New to Notion?

Learn more about Notion from our classes. We recommend you check out our tutorials and build-with-me tutorial series to learn Notion more efficiently by practicing and building. Keep experimenting with Notion functions and you will surely find a way to adapt them to your specific needs!
✨ Interested in trying out Notion? Notion has free plans for all users as well as paid plans for more advanced features and you can sign up here
✨ Interested in Notion AI? If you like to try to see how Notion AI automates your workflow, find the link to sign up here.
Full disclosure: we are a Notion Partner, so when you sign up with our link, you also help support us and our content!
Download our Templates
For the finished version of the template that we built during the build-with-me tutorial, download it for free below and check if everything is the same as your version!
✨ Although it’s free, we would greatly appreciate any support so that we can continue doing this. ❤️
If you have any questions or need further clarification on any of the steps discussed, please don’t hesitate to ask us!