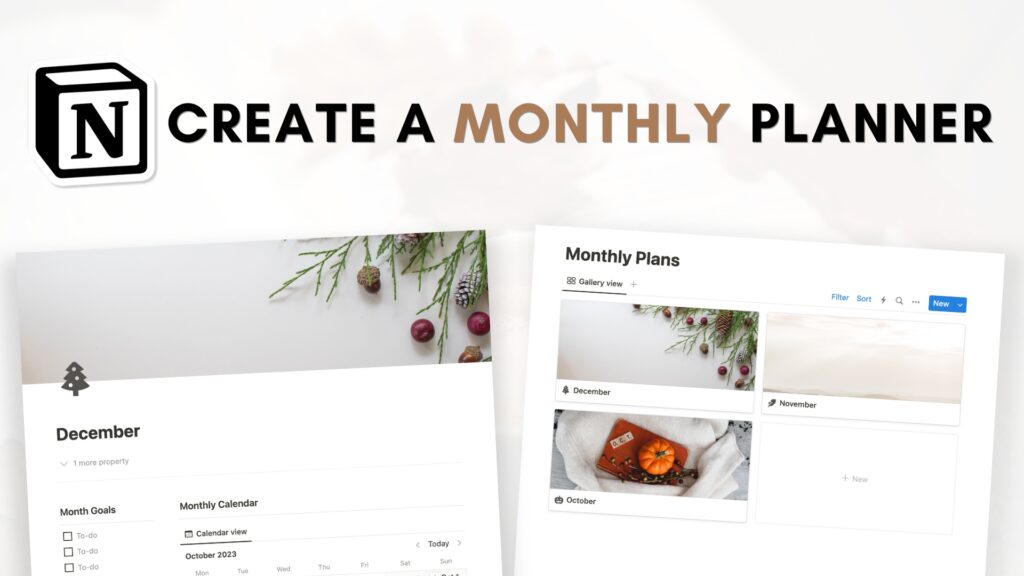
How to Build a Monthly Planner in Notion ( + free template)
Welcome to a comprehensive guide on crafting your very own monthly planner using Notion. Notion provides a platform to create personalized planning systems tailored to individual needs.
Let’s dive into the step-by-step process to establish a functional and aesthetically pleasing monthly planner template with Notion.
Creating the Monthly Planner Page
- Start by opening a blank Notion page and labeling it “Monthly Planner.”
- Personalize the page by adding a cover photo from Unsplash. Position it to your preference and save.
- Structure the page into two columns using “/column.” Designate the left for monthly plans and the right for the monthly calendar.
Setting Up the Monthly Calendar
- Generate a calendar view by using “/calendar” and selecting “Calendar View.”
- Establish a new database titled “Monthly Planner” to organize events.
- Enhance the calendar’s layout by hiding the database title and incorporating date and tag properties for better event categorization.
- Optimize visibility by displaying tags within the calendar for a clearer overview.
Establishing Monthly Plans Section
- Designate a separate section for monthly plans using a gallery view and naming it “Monthly Plans.”
- Customize the view by hiding the database title and adding cover photos to each monthly plan entry for a clean and visually appealing layout.
- Configure a template for each plan entry, incorporating date properties and a structured format that includes month goals, to-do lists, and reflections.
Creating a Template for Monthly Plans
- Formulate a structured template on a new page using headings, dividers, and checkboxes.
- Design the template to include sections for month goals, to-do lists, and reflections for the beginning and end of the month.
- Set this comprehensive template as the default for all future monthly plans.
Filter and Sort Functions
- Streamline the display of monthly plans by applying date filters to ensure only upcoming plans are visible.
- Arrange the display order by setting the sort function to prioritize the most relevant plans first, catering to your specific preferences.
Let’s start building your Monthly Planner in Notion!
We hope this build-with-me tutorial will help you get started with Notion and create a functional monthly planner Notion template. We recommend you to open your Notion workspace and follow our video at the same time so you can learn faster by building. You can also download the finished template for free below!
New to Notion?
Learn more about Notion from our classes. We recommend you check out our tutorials and build-with-me tutorial series to learn Notion more efficiently by practicing and building. Keep experimenting with Notion functions and you will surely find a way to adapt them to your specific needs!
✨ Interested in trying out Notion? Notion has free plans for all users as well as paid plans for more advanced features and you can sign up here
✨ Interested in Notion AI? If you like to try to see how Notion AI automates your workflow, find the link to sign up here.
Full disclosure: we are a Notion Partner, so when you sign up with our link, you also help support us and our content!
Download our Templates
For the finished version of the template that we built during the build-with-me tutorial, download it for free below and check if everything is the same as your version!
✨ Although it’s free, we would greatly appreciate any support so that we can continue doing this. ❤️
If you prefer a pre-made template with more built-in functions, be sure to check our Daily, Weekly, and Monthly Planner Notion Template. This is the perfect planner if you want a way to plan your day, week, and month seamlessly. There are additional spaces for reflections and goal setting!