10 Best Tips to Use Calendar in Notion | Step-by-Step Tutorial (2024)

Did you know that Notion lets you view, organize your tasks, and schedule them in a calendar format?
With Notion Calendar View, you can create detailed to-do lists, set reminders, and even integrate your calendar to ensure you never miss an important deadline. It's a comprehensive versatile platform that can significantly streamline your workflow and keep all your essential information in one easily accessible place.
Tip 1. Master How to Create Calendar Databases in Notion
There are three main methods to create a calendar view in Notion. Depending on the context and your specific needs at a given moment, one method might be more suitable than the others.
- Transform an Empty Page into a Calendar Database: If you're already working on a page that you'd like to convert into a database, go to the three dots at the bottom of the page, and click on 'Calendar'. This will transform the current page type into a database.
- Create an In-Line Calendar Database with an Empty Page: Begin with an empty Notion page, type '/Calendar', and then click on 'Calendar View'. This will create an inline Notion Calendar database
- Using an Existing Calendar View Database: If you already have an existing database in Notion, you can add calendar as a linked view database. All you have to do is type "/linked view of database" and select the correct database that already is in a table view. Any changes you make here will be reflected in the main database.
If you want to convert a different type of database into a Calendar view, hover over the setting of the database, go to the three dots, select “Layout”, and convert it into a Calendar. Note that this won't show entries unless the database has date properties.
Tip 2. Add Calendar Entries
To add calendar entries in Notion, open your Calendar Database and navigate to the calendar view in your Notion workspace where you want to add an entry.
Click on the date where you want to add a new entry or click the "New" button usually found at the top right corner of your calendar view. As you fill in the details, make sure to enter the title of your entry and add any necessary properties such as tags, checkboxes, or additional dates. Click outside the entry or press "Enter" to save the new calendar entry.
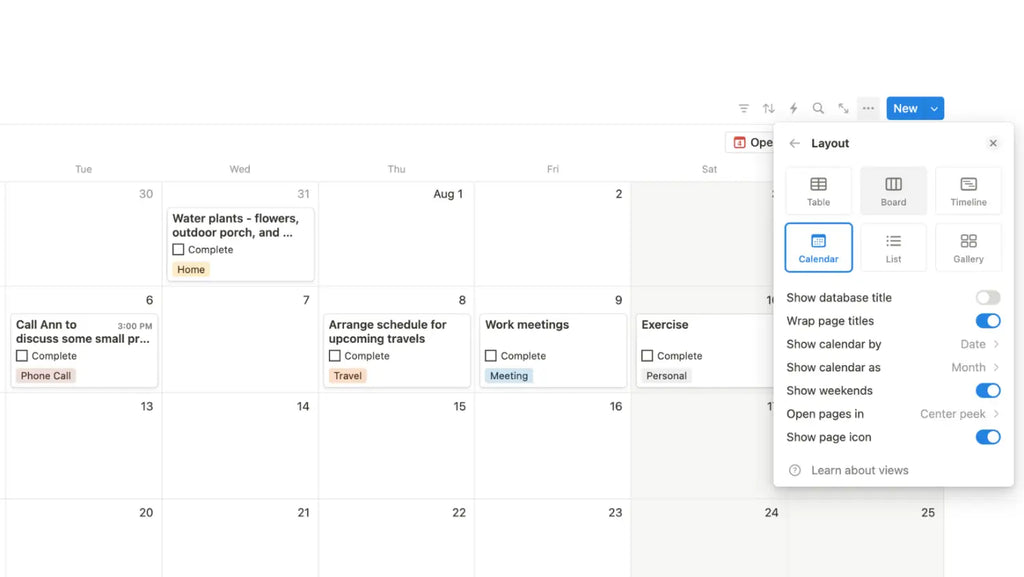
Tip 3. Wrapping Text
If you have long titles for your calendar entries, you can enable the "Wrap Page Titles" option. This ensures that longer titles are fully visible by wrapping them into multiple lines. To enable this, go to the three dots in the upper right corner of your calendar view, select "Layout," and toggle on "Wrap Page Titles."
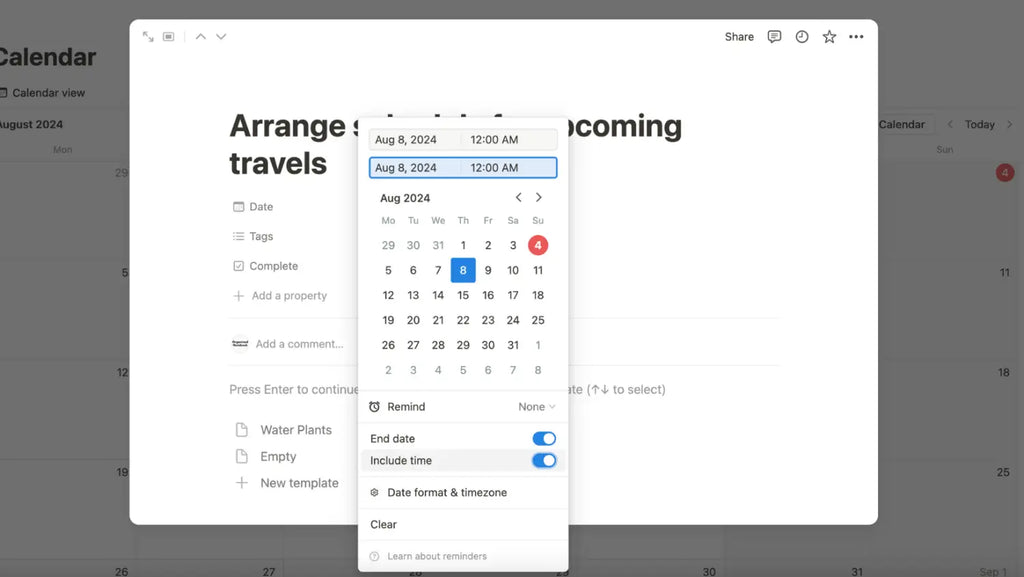
Tip 4. Showing Time
For entries that require specific timing, you can include the time in your calendar entries. Open an entry, click on the date, and toggle on "Include Time." This allows you to add start and end times, although only the start time will be visible in the calendar view.
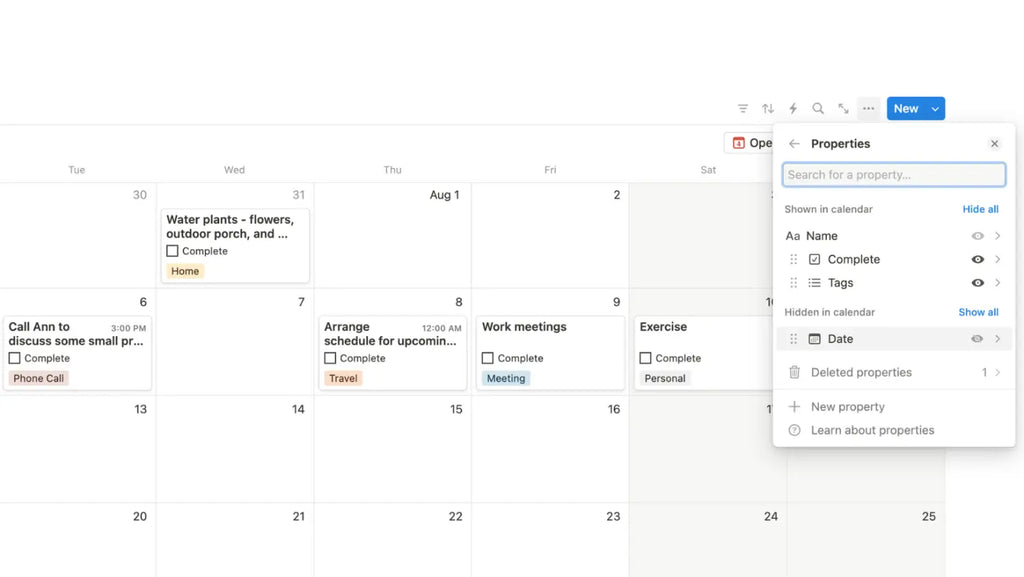
Tip 5. Additional Date Options
You can add a second date to an entry and choose to display the calendar based on this second date. This is useful for tracking deadlines or events with multiple important dates. To set this up, go to the three dots, select "Layout," and choose the date to display.
Tip 6. Starting Week on Monday
If you prefer your calendar week to start on Monday instead of Sunday, you can change this setting. Go to "Settings and Members" in the left-hand sidebar, then "Language and Region," and toggle on "Start Week on Monday."
Tip7. Hiding Weekends
If your work or planning schedule only requires a five-day view, you can hide weekends to streamline your calendar. To do this, go to the three dots, select "Layout," and toggle off weekends.
Tip 8. Useful Properties in Calendar Database
Some useful properties in a Notion calendar database include:
- Date: The primary property to schedule tasks or events.
- Tags: To categorize or label entries for better organization.
- Checkboxes: To mark tasks as completed.
- Select/Multi-Select: For adding status, priority levels, or other categorizations.
- Person: To assign tasks or events to individuals.
- Files & Media: To attach relevant documents or media.
- Text: For additional notes or descriptions.
- URL: To include links to external resources or references.
- Numbers: For tracking quantities, hours, or other numerical data.
- Relation: To link entries to other databases within Notion.
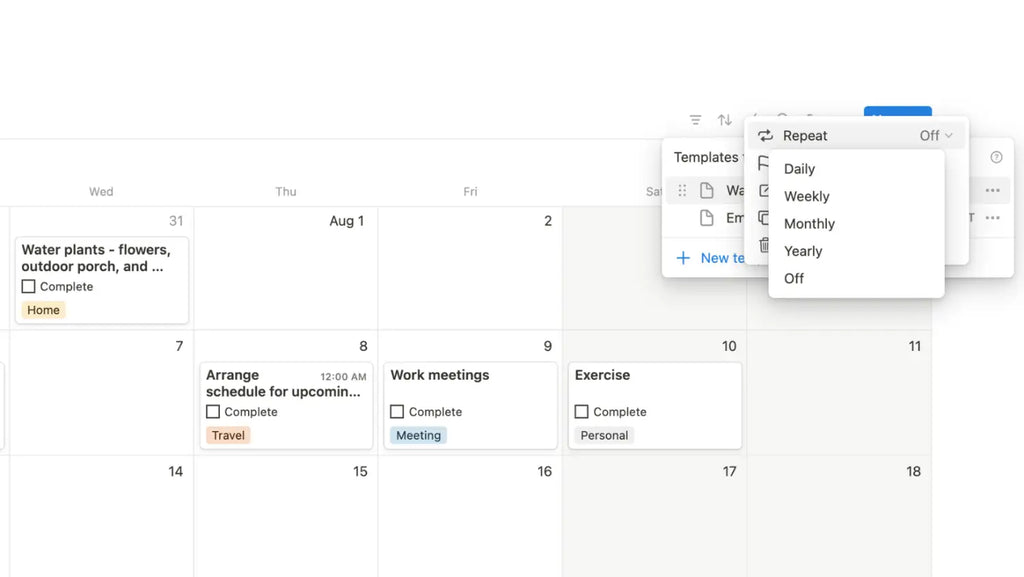
Tip 9. Recurring Entries
For recurring tasks, start by creating a new template tailored to the specific task you need to repeat. Make sure to enter all the necessary details, including the task's name, description, and any relevant notes that might help in completing it. Once you've filled in the details, set the task to repeat weekly. By doing this, you ensure that the task will automatically appear on your calendar at the specified time every week, helping you stay organized and on top of your responsibilities without having to manually re-enter the information each time.
Tip 10. Integrate with Notion Calendar
By linking your Notion calendar database with the Notion Calendar app, you can seamlessly synchronize your tasks, events, and deadlines across platforms. This integration allows you to view and manage all your scheduled items in one unified interface and enables real-time updates. Any changes made in Notion are instantly reflected in the calendar app. This cohesive system streamlines your workflow, making it easier to keep track of your commitments and manage your time effectively.
MASTER your schedule with Notion Calendar? | Full Guide (2024)
Look for more features to take your planning & scheduling to the next level?
- Time Blocking Planner Notion Template
- To-Do List Bundle
- Daily, Weekly, Monthly Planner
- Content Planner
Excited to learn more about Calendars in Notion?
If you are eager to learn more through real-life examples, we strongly recommend you watch our tutorial for a comprehensive, step-by-step video guide below on making the best out of this functionality in Notion. To learn more, read more in Notion’s Official Guide here.