Resource Hub Notion Template
Welcome to our Resource Hub Notion Template! This is a wonderful template that will work well with Notion’s web clipper and allow you to use Notion as a “Second Brain”. You can store any information, ideas, and resources you find and categorize them so that you can easily access them. If you’re new to Notion we recommend that you check out our article on how to get started with Notion!
You can get this Resource Hub Notion Template through Gumroad and find our tutorial below: Download Here!
Tutorial
This Resource Hub Notion Template is designed to store all of your resources in one place. No matter what topics you are interested in, you can keep all of your resources categorized so that you can access them easily. This template is also highly customizable for your own needs. There are limitless possibilities on what kinds of categories you can add for your resources. We also developed this template so that it could be paired easily with the Notion web-clipper.
Overview:
When you first download the template you’ll notice that the main section is the Resource Database. Here, all of your resources are filtered based on the category. Each item inside the database also has customizable properties where you can add more information. On the left-hand side, there is a quick access menu for all of your categories.
Add a New Resource:
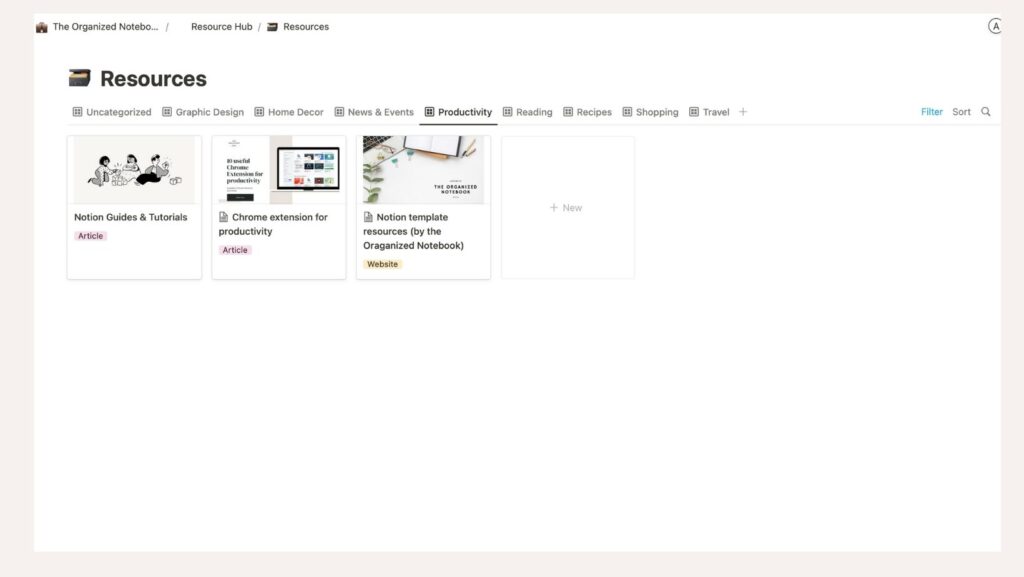
To add a new resource, click “+ New” in the uncategorized filter. A new page will pop up for your resource. Fill in the title, date, category, type, url, and description. Feel free to also add a cover photo.
If the category you want to add doesn’t exist yet, we’ll explain how to add it in the next section!
Set up your Categories:

If you want to save a resource that is not a part of any of the pre-existing categories, you can add a new category when adding a new resource. Simply type the name of the new category and click “create” inside your resource.
Once a new category is added, you’ll next need to make a new filter. Click on your list of filter views and duplicate one of them. You can do this by opening the list of database views and clicking the three dots next to the name. Once it is duplicated, rename the view by clicking the three dots again. Now click “Filter” and change the filter to “Category: is” and check the box with your created category. Now choose “Save for Everyone”.
On the left-hand side, you’ll also want to update the menu. To do this, type the name of the category in the menu. Then go to the category’s filter, and “Right-Click” or “Ctrl + Click” the filter view title. You’ll have an option to “Copy Link”. Highlight the name of the category in the menu, and add the copied link as your link.
Using Notion’s Web Clipper:
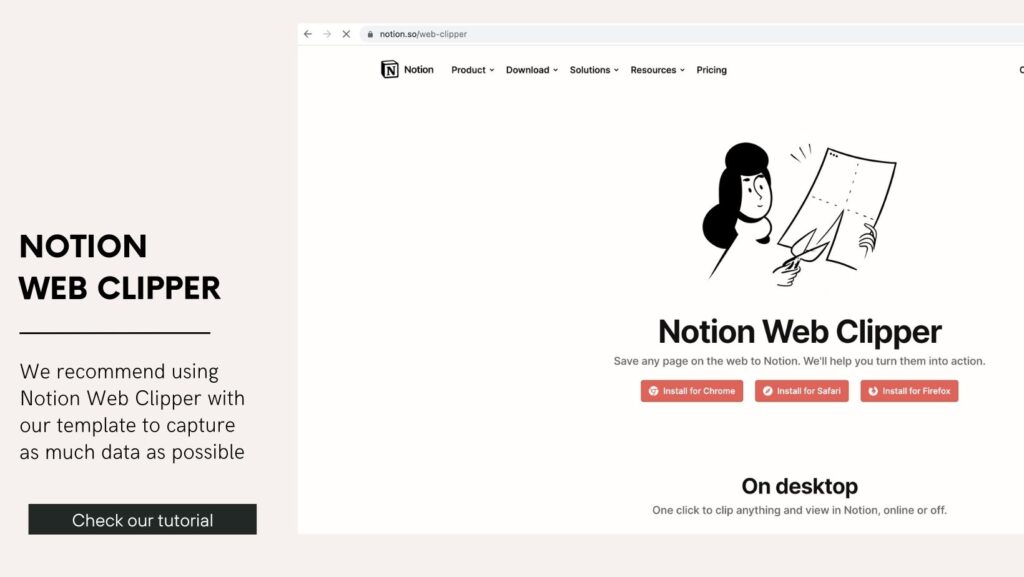
If you’d like to add a new resource using Notion’s web clipper you’ll need to go to the chrome store and add the free chrome extension. Then, make sure you’re logged in to Notion on your browser.
Go to the page you want to save to the Resource Hub, and click the Notion icon in the Chrome browser. You’ll be able to title the resource, then make sure you are in the right workspace. Find the Resource Hub template by going to the “Add to” section and finding the database called “Resources”.
Now, when you save a page it will automatically appear in the uncategorized section.Make sure to add the category through the uncategorized section and all other relevant information later.